Setting your OpenVPN password
Your password can be set in the Password Portal. This password must be unique. Your username looks like uun/ovpn.
For example, if your DICE username was bertha then your OpenVPN username would be bertha/ovpn.
OpenVPN is the only service where you should use this /ovpn username.
Get the configuration files
First, download this configuration file or this one or both onto your device. (Why is there more than one configuration file?)Install the app
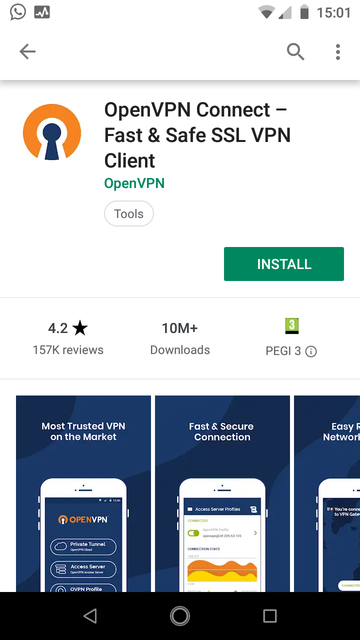 Next, download the "OpenVPN Connect" app from the Android Play Store.
Import Config
 Open the OpenVPN Connect app and tap the "OVPN Profile" button at the bottom of the home screen.
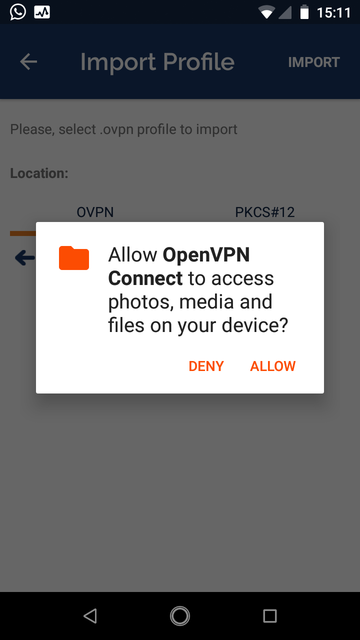
If this is the first time you've run the application, then you'll be taken to the "Import Profile" screen. However, the first time you do this you will have to grant permission for the OpenVPN Connect app to access your media and files.
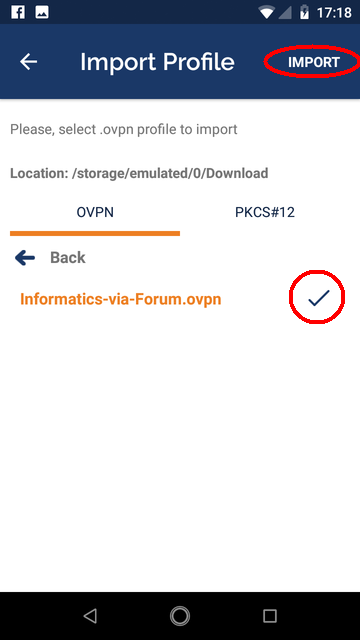
Browse to the location you saved your .ovpn file, tap on it so it has a tick mark beside it, and then tap "IMPORT".
Setup
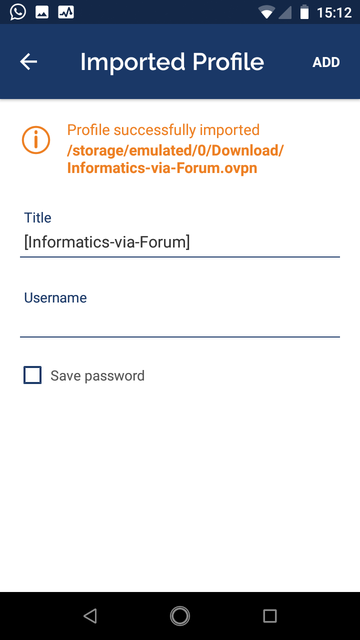 You should then be taken to a screen saying that the profile has been imported. You can change its name if you like.
Enter your DICE username. You shouldn't tick the Save check box unless your device is encrypted and protected with a password or pin of some sort. If you do tick the Save password box, then you'll be prompted to enter your DICE password.
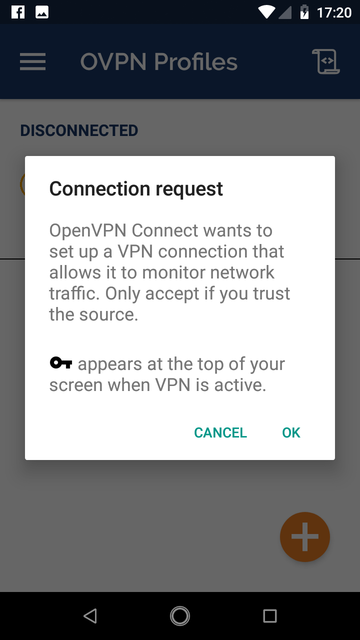
Tap the "Add" button when you are done. This will bring up a warning screen that you have to accept if you wish to continue. You'll also be prompted to enter your DICE password (unless you chose to save it earlier).
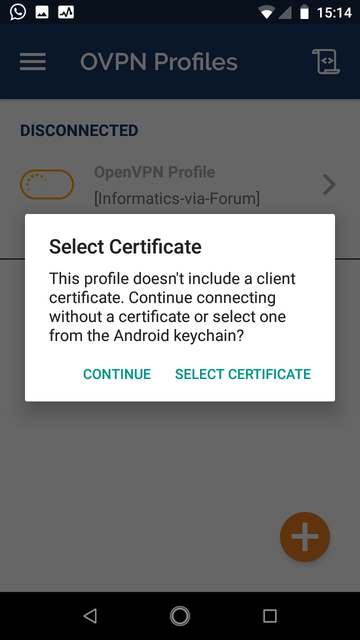 Next you will get a warning that the profile doesn't include a client certificate; just tap CONTINUE to proceed without one.
Connected
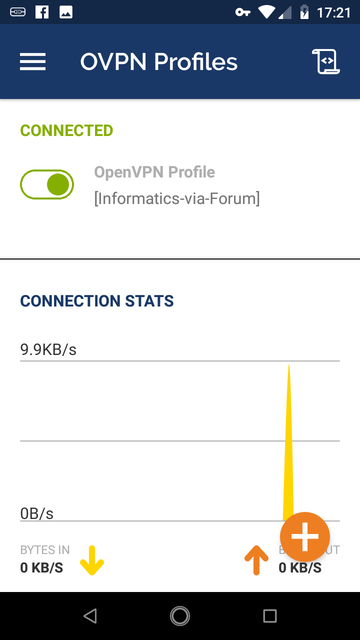
If it's all gone well, you will now be connected to the VPN, and the screen will show you some connection statistics, along with a button to disconnect and close the VPN.
This will be the screen that you will see if you switch away to another app and then back to OpenVPN Connect.
While you are connected you'll see the key and OpenVPN icons in the notification bar, and depending on which profile you chose, some or all network traffic will pass through the VPN and your device will appear to be on the Informatics network.
Remember to disconnect when you are not using the VPN, as it will eat through your battery.