Note: It is assumed that you are already connected to the internet when following these steps.
Installing Kerberos
- In a terminal window, run the command
sudo apt-get install krb5-user
- Enter your local account password. When prompted to continue, press
Yand thenEnter.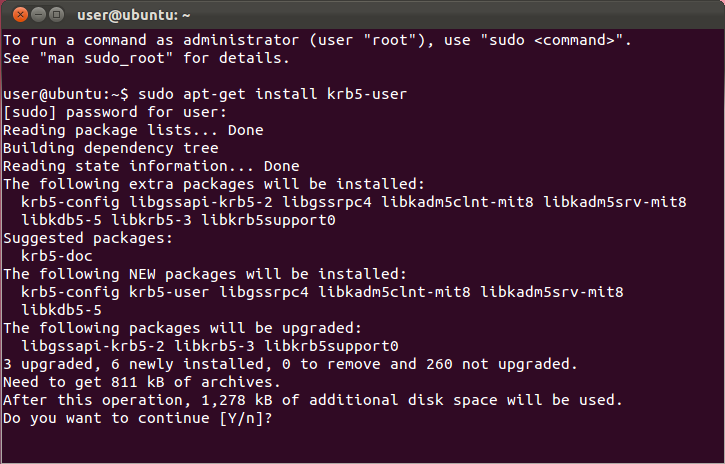
- You will be asked to enter a default Kerberos 5 realm. Enter
INF.ED.AC.UK(all caps).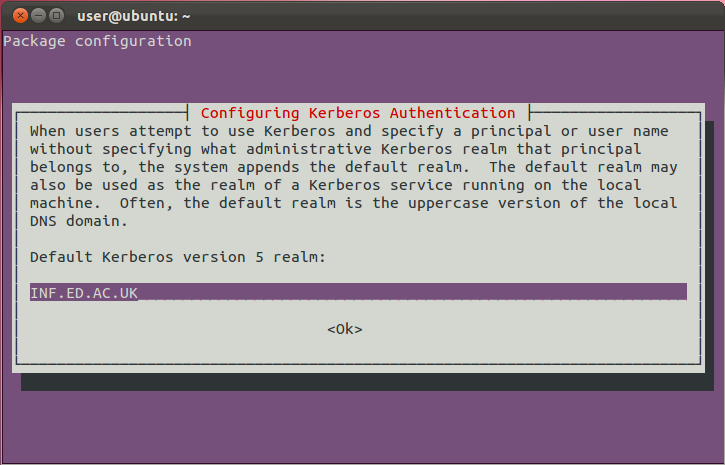
- Press
Enter. Installation should complete itself from this point on.
Using Kerberos
To use Kerberos authenticated services, you first need to obtain a ticket using the kinit command. Tickets will be destroyed when you restart your computer, when you run the command kdestroy, or when they expire. You will need to run kinit again after any of these occur. Depending upon your Kerberos client configuration you may need to add the -f flag to request a forwardable ticket.
- Run the command
kinitfollowed by your DICE username, e.g.
kinit -f fred

Password for fred@INF.ED.AC.UK:
Enter your DICE password and press enter. If successful, the command will return no output.
Note: If you have another realm set up as your default, append @INF.ED.AC.UK to your usernameThe
kinitcommand accepts a number of options to modify how long your ticket lasts, how long it can be renewed for, and options for forwarding and proxying. For further details:man kinit - To check, list, or show all your tickets, run the command
klist:
klist

Ticket cache: FILE:/tmp/krb5cc_1000
Default principal: fred@INF.ED.AC.UK

Valid starting     Expires            Service principal
08/02/16 17:54:43  09/02/16 17:54:39  krbtgt/INF.ED.AC.UK@INF.ED.AC.UK
What now?
Now that you have configured Kerberos, you might want to read the following guides which explain how to use it in our computing environment: