Please note that, instead of following the instructions below, we now STRONGLY RECOMMEND that you use the version of Kerberos which comes as part of the Auristor OpenAFS client and follow the procedure detailed in AFS for Windows to obtain Kerberos credentials and (optionally) AFS tokens.
This document describes how to install and configure Kerberos for Windows. This procedure was last tested on Windows 10 (64-bit), but should be applicable to newer versions of Windows.
Download and install Kerberos
Please choose one of the following:
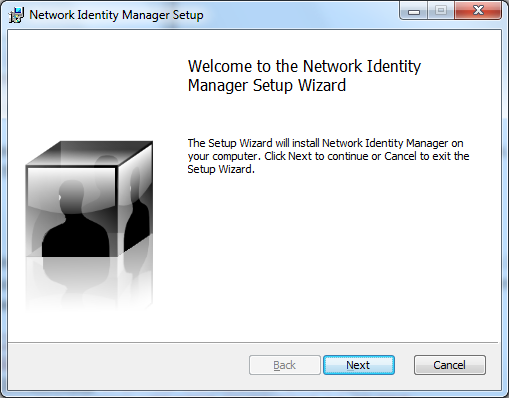
Download and install Network Identity Manager
The next stage in the process is to download and install Network Identity Manager, again from Secure Endpoints:
https://www.secure-endpoints.com/netidmgr/v2/
Again, you will need to choose between 32-bit and 64-bit installers (64-bit machines require only the 64-bit installer). Choose the appropriate version without SDK.
Run the installer:
Click through all the default options ("Typical install", etc; and finally "Finish").
Run and configure Network Identity Manager
Run Network Identity Manager for the first time from the Start menu (Windows 10 users may need to restart Windows before Network Identity Manager works correctly):

Following this, an icon for Network Identity Manager should appear in the system tray (this is found in the bottom right part of the Windows Task Bar). Click on this icon. If the icon doesn't appear, you might need to click on the up arrow first and then select Show Network Identity Manager.
For users of MIT Kerberos only: It is recommended that you disable the Kerberos v4 plugin in Network Identity Manager before proceeding. This can be done by selecting Options->Plugins from the menu, selecting Krb4Cred and clicking "Disable". You will be prompted to confirm and restart Network Identity Manager.
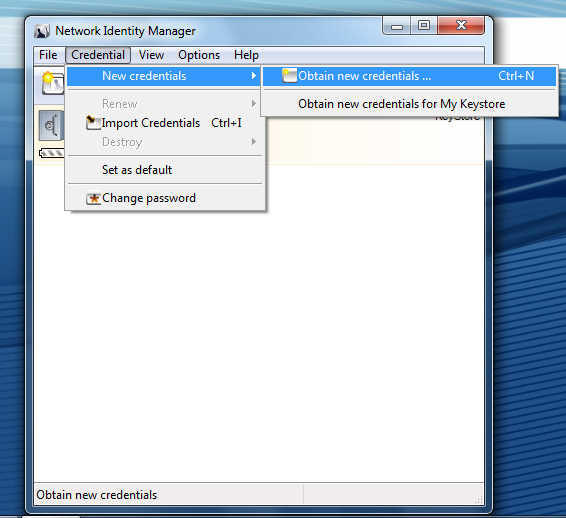
Once Network Identity Manager has (re)started:
Select Credential -> New credentials -> Obtain new credentials ...
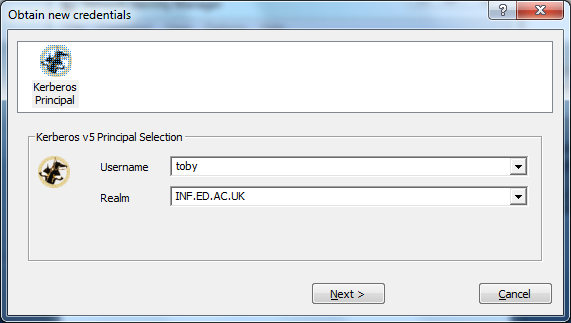
Enter your DICE username in the Username box and INF.ED.AC.UK (this must be upper case) in the Realm box and click Next:
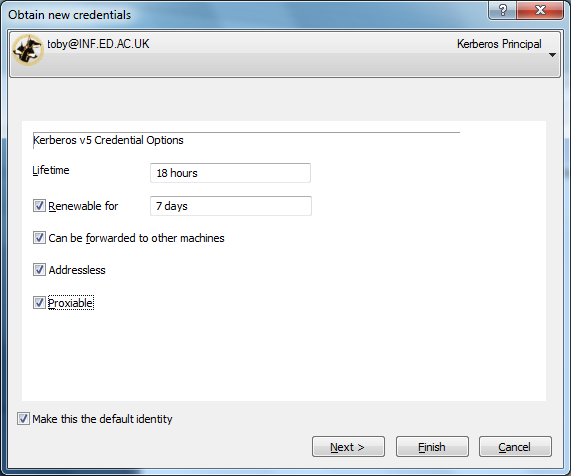
Optionally, tick the "Proxiable" and "Make this the default identity boxes" and increase the lifetime to 18 hours (this is the maximum lifetime for DICE user credentials). Click on Next (not Finish):
Enter your DICE password in the Password box and then tick "Make this the default identity" (again!) Select "Save password in My Keystore" if you want the password for your DICE identity saved on this machine and click Next:
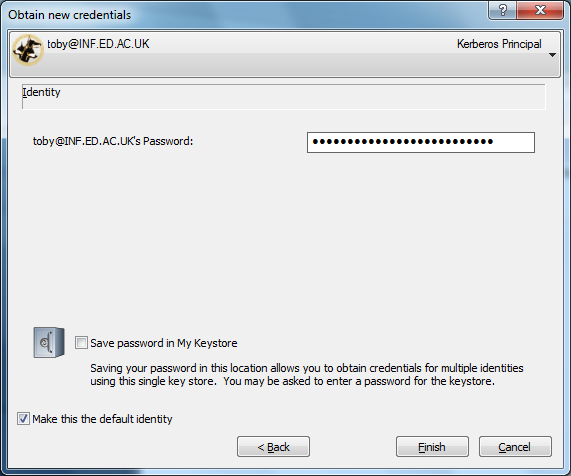
Finally, click Finish, you should see a status dialog box appear briefly as your credentials are obtained.
Note if you have chosen to save your password, click Next instead, and then follow the prompts to set up a keystore.
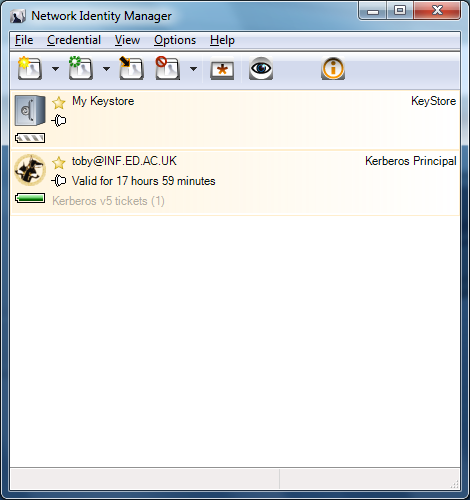
Once your username and password have been authenticated, you will be returned to the main Network Identity Manager window which should contain a new entry indicating that Kerberos tickets have been successfully obtained:
What now?
Now that you have installed Kerberos on Windows, you may want to:
Configure AFS
Configure SSH (including logging in without a password)
Configure Firefox and Chrome for single-sign-on with our Cosign service