PuTTY is both an ssh client and a terminal emulator. You can use it to remotely login to Informatics machines using ssh. See also: using ssh from Windows.
You can log in using your DICE password ("keyboard-interactive"), or use Kerberos if you have that installed and configured (for example, if you've configured your machine for AFS).
Instructions on configuring PuTTY for Kerberos are below.
Download PuTTY
The easiest option is to just save putty.exe on its own to a location of your choice, though there is also a Windows installer package.
Configuring PuTTY for the first time
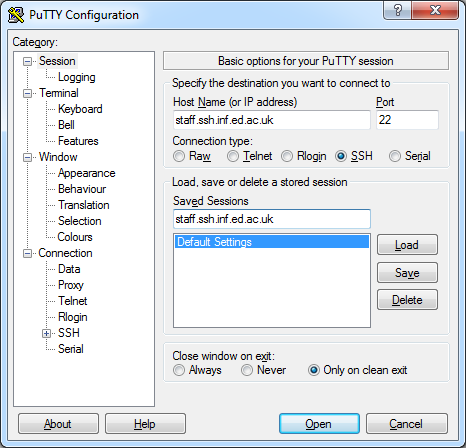
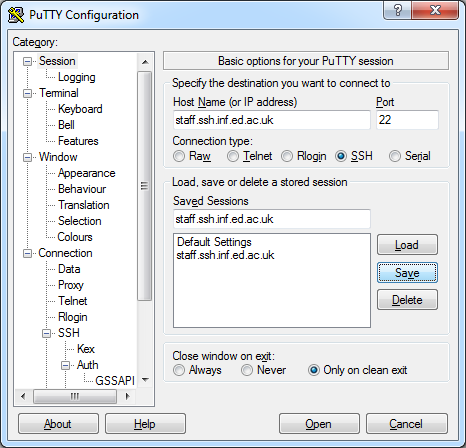
To start off, run the PuTTY executable, and then enter one of the following into the Host Name box. Put whatever you want the connection to be called in the Saved Sessions box, though we’d recommend keeping it the same as the Host Name.
For taught students:
student.ssh.inf.ed.ac.uk
For staff and research students:
staff.ssh.inf.ed.ac.uk
Leave the remaining options as-is for now.
Please note The above servers are not directly
accessible from outside the university; you will need to use a VPN. You will need to contact support if you would like to discuss alternative options.
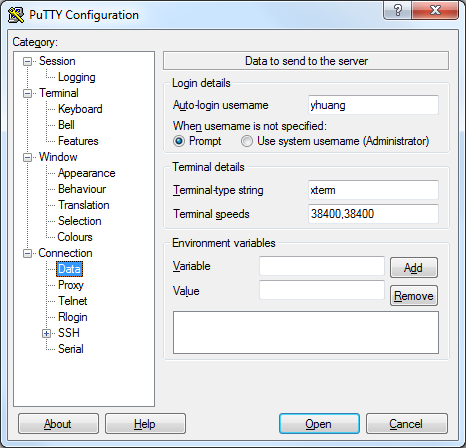
From the Category menu on the left, select Data under Connection. If you are the only user of your machine, enter your DICE username in the Auto-login username box. If the user account on your machine is used by multiple people, it’s best to leave this box blank.
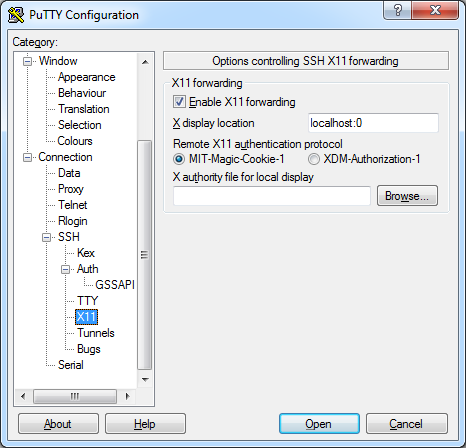
If you want to use X11 forwarding (i.e. running graphical X window applications remotely), navigate down to the X11 entry under SSH, select the Enable X11 forwarding checkbox and enter localhost:0 for X display location. You will need to have an X11 server installed on your local computer first such as Xming X Server.
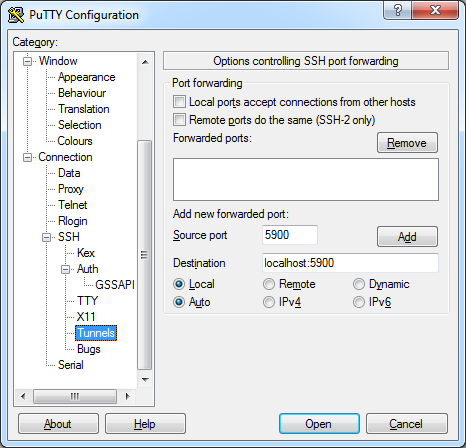
If you want to use port-forwarding and tunnelling, navigate to the Tunnels page under SSH and enter the ports as required (the following is only an example):
Finally, navigate back to the Session page and click Save:
From now on, when you start PuTTY, you can just double-click your connection entry in the Saved Sessions list to automatically connect, authenticate, and open a terminal session.
Optional: Configuring PuTTY to work with Kerberos
Follow the Kerberos client installation instructions, and return here (you will already have the client if you've configured your machine for AFS).
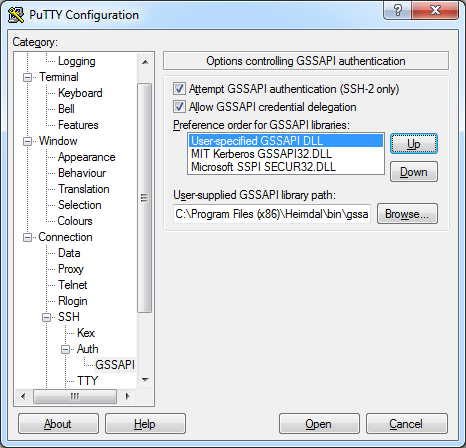
From the Category menu on the left, expand the SSH group, then the Auth group and finally select GSSAPI. In this window, tick the “Allow GSSAPI credential delegation” box.

Then, click Browse and select the gssapi32.dll of your Kerberos installation. On 32-bit systems this will normally be
C:\Program Files\Heimdal\bin\gssapi32.dll
On 64-bit Windows, this file will normally be
C:\Program Files (x86)\Heimdal\bin\gssapi32.dll
Finally, select the User-specified GSSAPI DLL entry in the Preference order box and then click Up twice so it is top of the list: